 Lisa Anderson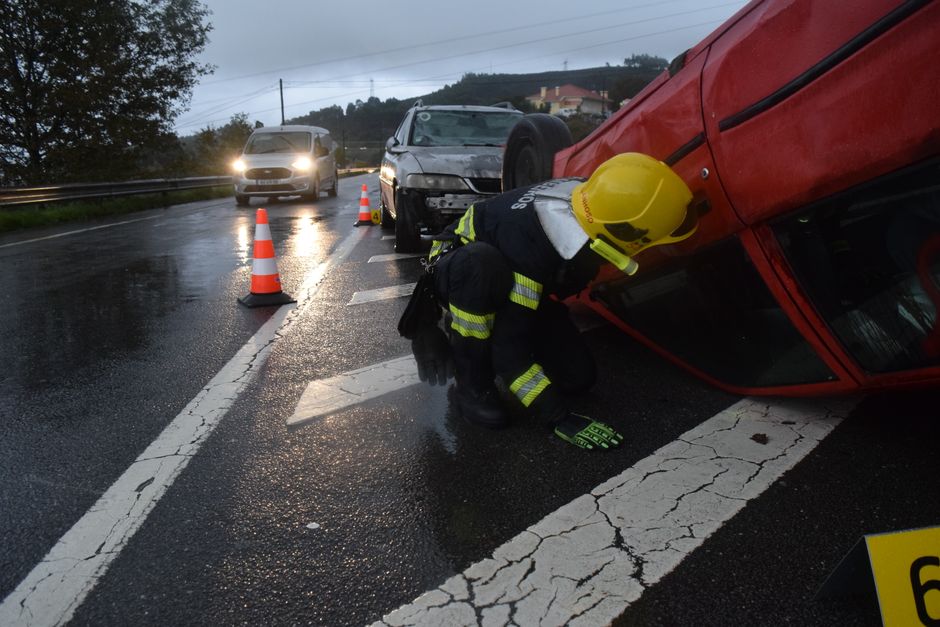
Most people take three photos at an accident scene. A shot of the cars, a shot of the other driver’s license plate, maybe one more. Then they put their phone away, convinced they’ve handled it.
They haven’t. And I know this because I spent over a decade on the other side of these claims, reviewing exactly those three photos and watching them fail to tell the story that actually mattered.
I’ll be honest: when I was an adjuster, incomplete accident scene documentation made my job easier. Not because I was trying to cheat anyone, but because a claim without visual evidence defaults to the official version of events. The police report. The other driver’s statement. Whatever the insurance company already suspects about how the crash happened. Your three photos of a crumpled bumper don’t change any of that.
What surprised me, after switching sides and working with injury victims, was how many people think the police will document everything for them. Police officers are there to manage a chaotic scene, redirect traffic, and write a report. They are not building your personal injury case. Their photos, if they take any, serve the investigation. A good officer might snap a dozen pictures. A busy one might take two. You cannot count on it.
Here’s what thorough documentation actually looks like.
The First Two Minutes Matter More Than You Think
Shock does strange things to your priorities. You want to check on everyone, call someone, get off the road, stop shaking. All of that is human and understandable. But the first two minutes after you’re clear of immediate danger are also the last time the scene will look exactly the way the crash left it. Glass gets swept. Cars get moved. Skid marks get driven over. That window closes fast.
Start wide. Before you touch anything, before you talk to the other driver, walk a full circle around the scene and take wide establishing shots from each direction. These panoramic frames give context that close-up detail shots can’t. They show where the cars ended up relative to the intersection, which lane, how far from the crosswalk. Context matters enormously when a dispute turns on who had the right of way.
Then work your way in. Take medium-distance shots showing the relationship between the two vehicles: which part hit which part, at what angle. A head-on shot of your front bumper tells one story. A three-quarter angle showing the point of contact tells a better one.
Then get close. Real close. Every panel that’s damaged, every piece of trim that’s hanging, every scrape and gouge. Get on one knee if you have to. And here’s the thing most people skip: photograph the undamaged parts of both cars too. If the other driver later claims your car had pre-existing damage, those photos are your defense.
The Detail Shots People Almost Never Think to Take
Helpful resource: Leuchtturm1917 Hardcover Notebook for Personal Records is a top-rated option for this. (As an Amazon Associate this site earns from qualifying purchases.)
Skid marks. I cannot stress this enough. Skid marks tell a forensic story about speed, braking distance, and where a vehicle was in the lane before impact. They’re also temporary. A rainstorm, a street sweeper, three hours of traffic, and they’re gone. Take multiple shots from different angles. Photograph the full length of the marks, not just where they start or end. If you can get a wide shot that shows the skid marks leading to the final vehicle position, you’ve just created a piece of evidence that reconstructionists use to calculate pre-impact speed.
Road conditions deserve their own set of photos. Wet pavement, gravel, a pothole near the point of impact, faded lane markings. If road conditions played any role in the crash, document them immediately. These are the kinds of factors that can shift liability significantly and that almost nobody captures.
Traffic signals and signs. Photograph them before you do anything else if there’s a signal-related dispute, because you need to show not just that a signal exists but where it is positioned relative to where each car was.
Debris field. Every piece of glass, every chunk of plastic, every hubcap. Where debris lands is physics. It tells investigators which direction the vehicles were traveling and where the point of impact actually was, which sometimes differs from where the cars ended up after they moved.
One more that people overlook: tire marks that aren’t skid marks. Side-slip marks, yaw marks (those curved tire marks left when a car rotates), they tell a different story than straight braking marks and are critical in certain types of crashes. Take them all.
The Other Driver and the Scene Context
Photograph the other driver’s license plate immediately. Not eventually. Immediately. People have driven away from scenes. I’ve seen it happen in claims I worked. Get the plate before anything else.
Then photograph their vehicle’s VIN if you can access it through the windshield, usually visible at the lower left corner of the driver’s side. The license plate tells you who the car is registered to; the VIN is the car’s permanent identity regardless of registration changes.
Photograph the other driver’s license and insurance card. Don’t just copy down the numbers; take pictures of the actual documents. Transcription errors in a stressful moment are incredibly common.
Here’s something most guides won’t tell you: if the other driver is making statements at the scene, whether an apology, an admission, a claim they didn’t see you, some attorneys ask clients to take a brief video as a factual record of the scene and ambient conditions. Not secretly recording someone’s statements (which has its own legal complications that vary by state), but capturing the environment. The angle of the sun. The line of sight from each driver’s position. Whether a stop sign is partially obscured by overgrown branches. Those environmental details fade from memory within days.
Photograph any witnesses before they leave. Their cars, their license plates, their faces if they consent. And get phone numbers written down or photographed from their screens. Witnesses disappear. Good ones who would have supported your claim become unavailable.
Injuries: The Photos You Don’t Want to Take But Absolutely Should
I’ve had clients tell me they didn’t take photos of their injuries at the scene because they were embarrassed, or in shock, or thought it was unnecessary because they were heading to the ER. Here’s the problem: bruising develops over 24 to 72 hours. Soft tissue injuries often look worse on day three than they did at the scene. A photograph taken immediately shows initial injury state. Photos taken over the following days and weeks document progression. Both matter.
Take photos of every visible injury. Cuts, road rash, bruising, swelling. Remove clothing if necessary and appropriate. Your seatbelt left a mark across your chest? That’s documentation of the impact force, not just injury. A bruise across your collarbone from the shoulder belt is evidence. Photograph it.
Date and timestamp your photos. Most modern phones embed this in the metadata automatically, but double-check your camera settings. If your phone doesn’t add metadata, take a picture of a newspaper or your phone’s screen showing the date before you start shooting. It sounds old-fashioned, but it works.
A good personal injury documentation journal (there are several decent ones available on Amazon, and this site may earn a small commission if you purchase through a link) is worth buying the day after an accident. Paper logs of daily symptoms, limitations, pain levels, have held up in ways that casual notes in a phone don’t, especially when they’re handwritten and dated contemporaneously.
What Happens to Photos After You Take Them
Back them up. Right now, before you leave the scene if possible, enable automatic backup to iCloud or Google Photos. I’ve worked claims where the injured person’s phone was destroyed in a subsequent incident, stolen, or simply failed, and every photo was gone.
Send them to your email. Old school but reliable. An email timestamp creates an independent record of when the photos existed and what they showed.
Do not edit or filter them. I mean it. Not even a brightness adjustment. The moment you apply any filter or edit to an accident photo, you’ve potentially compromised its use as evidence. Insurance adjusters and opposing attorneys look for this. The raw, unedited original is what has evidentiary value.
The American Bar Association’s public education guidance emphasizes keeping organized records of all documentation related to an injury claim, and Nolo’s personal injury resources go into considerable detail about how photographic evidence is actually used during the claims and litigation process. Both are worth bookmarking if you’re trying to understand how the system actually works.
One thing I’d push back on: the idea that you should send all your photos to the insurance company immediately. I understand the impulse to be cooperative and transparent. But photos shared too early, before the full scope of injuries and damages is known, can be used to argue that the harm was minor. Talk to an attorney before you share your full documentation with any insurer. That’s not being deceptive; that’s understanding how the process works.
This article is for general informational purposes only and does not constitute legal advice. Laws vary by state. Consult a licensed personal injury attorney in your jurisdiction for advice specific to your situation. Most personal injury attorneys offer free consultations.
Sources
- Leuchtturm1917 Hardcover Notebook for Personal Records
- How to Win Your Personal Injury Claim by Joseph Matthews (Nolo)
- Pendaflex Portable File Box for Legal Documents
- Rui Dias
- Victim to Victory: A Personal Injury Survival Guide
Disclosure: As an Amazon Associate, we earn a small commission from qualifying purchases at no extra cost to you. We only recommend products that genuinely support the topics covered in this article.
- Victim to Victory: A Personal Injury Survival Guide (~$16), Written by a personal injury attorney, explains the full claims process, how insurance companies calculate settlements.
- Navigating Personal Injury Claims (~$14), Covers the pre-litigation claims process step by step, medical documentation, negotiation tactics, and what to expect.
Recommended Resources
Disclosure: As an Amazon Associate, we earn a small commission from qualifying purchases at no extra cost to you. We only recommend products that genuinely support the topics covered in this article.
- Victim to Victory: A Personal Injury Survival Guide (~$16), Written by a personal injury attorney, explains the full claims process, how insurance companies calculate settlements.
- Navigating Personal Injury Claims (~$14), Covers the pre-litigation claims process step by step, medical documentation, negotiation tactics, and what to expect.
Sources and References
Guidance on records and evidence here draws on authoritative legal references: